Notes on Technique Considerations when Instructing on the Treadmill

Please take the time to read through and understand this. Pass along any questions you have about it as you read.
We are aware of a lot of the protocol used by the competition, at least in terms of the style and what they are trying to get at. At Competitive Edge we can use our treadmill for strength and explosion development by using high-angle training when that is right for the customer (only advanced skaters), but our priority is to allow us to effectively be Skating Coaches without (having to go on the) ice.
We will use our treadmill training most often to teach the stride (at a manageable exertion level… i.e. low angle and reasonable speed) and work on multitasking. And when a player does progress, we will use speed to challenge them first before we worry about angle. The exception to this is when we are doing “Stride Therapy” for a specific purpose.
Within the training process, the first and most important concern is safety. There are several key points here…
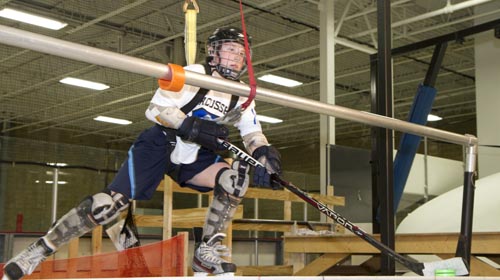
- Instructors should check to make sure the front loop on each players harness is installed before the two front straps go through their buckle and then back around to be velcro-ed. If this isn’t done the loop can be ripped out providing no protection.
- One of the front straps should be attached to the front of skaters to keep them from falling off of the back of the treadmill.
- At higher angles, use the shorter strap (black) as it is shorter and keeps players from falling off the back of the treadmill. At lower angles the yellow strap offers more room to drop back as it is longer.
- Instructors should always be in range of the emergency stop button when running the treadmill
(or flywheel). - Players should wear shin pads or long pants on the treadmill. If they don’t have them make sure to let them know to bring them next time.
The next concern is the development of skating technique. Competitive Edge clients tend to value a high level of instruction. This means both having an instructor with a high level of knowledge and having that instructor doing a lot of teaching during the training.
- “A lot of teaching” means if a skater is doing well, the instructor should be vocal about that. Let skaters know that their performance is what you want.
- If they are not doing well, continually remind them of the corrections you are looking for. Try to remind them with a correction every 3 to 5 seconds as an absolute minimum.
- Don’t be afraid to stop the training to teach. This gives their mind the chance to focus on you instead of the challenge of skating.
Note that a lot of this applies to training on the flywheel as well
The previous paragraphs spoke a lot about what behavior the instructor is expected to exhibit. Now lets look at what we are looking to have the skaters achieve. We are trying to develop a skating stride and the foundation of this is knee bend and posture. We should seek to get players in the correct position (deep knee bend and chest up) first and foremost. Sometimes in order to do this we have to give correction that is another way of getting the kid to do what you want by giving them an instruction that may seem unrelated.
An example of this that is, sometimes instead of telling a skater to “get their weight back over the center of their blade on the glide foot” we have to ask the skater to “drive their knee and foot forward further during recovery in order to get that foot forward so they will not be falling over their toes on that skate when it does become the glide foot”.
Lets look at all of our forward stride skating issues now in rough order of importance.
Knee Bend – coach players to 90 degree knee bend or slightly lower. However, if a player isn’t able to make themselves do that do not hold up the training waiting for them to get there. Just get them as low as you can get them for that day.
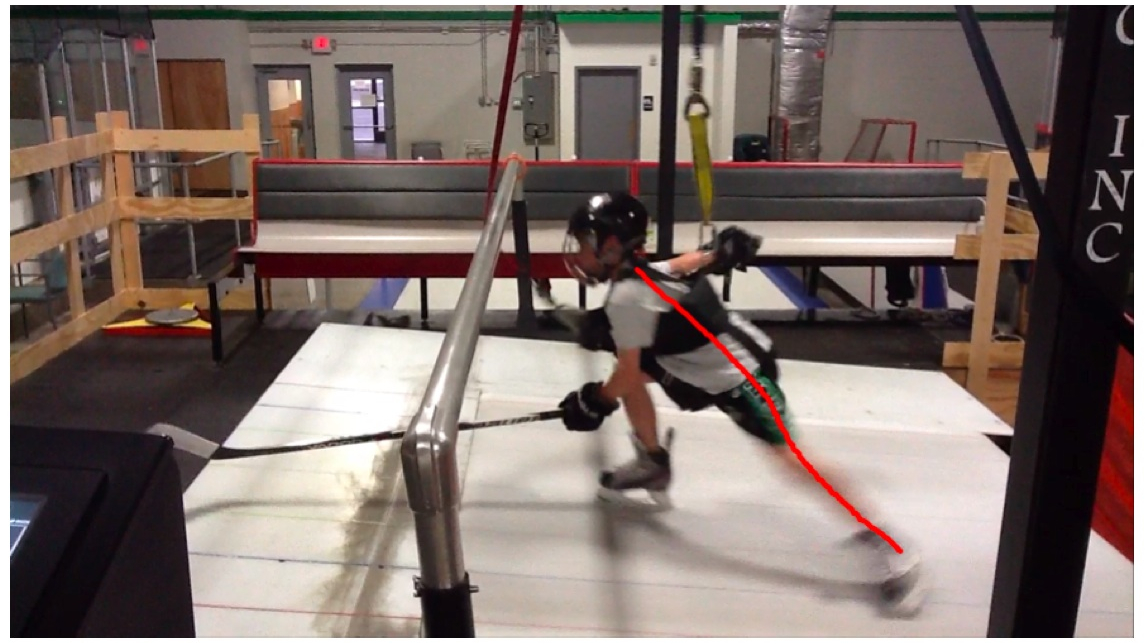
Posture – correct posture in skating is mostly needed to get the body weight away from the toes of the skates and back to a point where the skater has solid balance from which to work. Treadmills can have a detrimental effect on that, especially when used at angles, so keep your eye on this and try to make sure players get the weight back from the toes and onto the more flat part of the blade.
With that said, technically perfect posture has the upper body leaning forward at an angle that allows for the players to create a straight line with the leg and upper body when fully extended. In other words, if the player’s foot, knee, hip, and shoulder are all in a straight line when they are fully extended back, then the posture is correct.
Extension – we coach players to extend until their legs are straight at the knees in order to get everything out of the stride. Slowing things down helps players to do this. Other techniques such as asking them to hold their glide longer can force them to have better extension force and more extension.
- How do we want to recover? We want to recover low. We want to avoid kicking our skates up underneath our butts during recovery. We also don’t want to drag our feet on the ice (plastic).
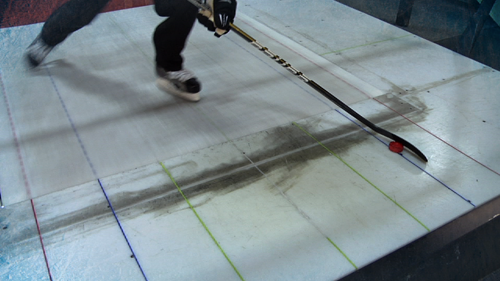
- Where do we want to recover to? We want to recover to the middle and forward. The middle would be right underneath our center of gravity. Forward means we bring that foot back far enough forward so that when we transfer weight to that foot it isn’t onto the toe of the blade, but more centered on the blade instead.
- With very advanced skaters we may not teach recovery all the way to the middle, but that is not our standard practice. Our normal plan is to teach players to recover to the red lines projected by the Stride Matrix.
Now for some additional notes to keep in mind…
Angle Use – We touched on it before, but thought it was worth saying again. We will use speed as our first priority when we want to challenge a player. Save high-angle training for advanced skaters who want to work on their “starts” range of motion or just get a severe work out. This machine is capable of extreme high angles. Also, we do use high angles with weaker skaters during “stride therapy” (see the video link at the bottom of this page for Stride Therapy details).
- Exertion level though is a combination of incline angle and speed settings on the treadmill. Basically, how much power is required not to drift backward? Ultimately the effort required to avoid backward drift is roughly proportional to what you would get if multiplied the speed and the angle together and this is the “exertion level” of whatever those treadmill settings are.
- While we should not train kids who aren’t ready for it at high exertion levels (high exertion levels for them… which basically means the lowest settings where their stride starts to get wild, frequently off-balance, and inconsistent), we typically should train close to those high exertion level settings. The reason is that it usually takes those close-to-high-exertion-level settings to allow less proficient skaters to produce quality stride pushes without skating themselves into the bar. Most novice to moderately experienced treadmill skaters will adjust to avoid skating into the bar by shortening and weakening (reduced muscle activity) their stride unless the treadmill assists them by demanding long extension and strength in their stride pushes.
Progression – Each Station has a progression that we must keep in mind in order to best make decisions about what training methods to use to help players work step-by-step to better technique. This is something that is learned to some degree in the shadowing process. In the future we plan a video-based system to do a more complete job of this. But, we can cover some of that here with the general concept we should work through (from ultra basic to advanced)…
- Deep Knee Bend (DKB) Hockey Position Glide
- DKB Swizzles
- DKB Slaloms
- DKB Single Leg Glide (one leg then the other)
- Basic Skating Stride at low speed
The above 5 steps can all be done in the first skate for most skaters.
- Basic Skating Stride at medium speed
- Basic Skating Stride at medium speed with one hand
All of the above steps are done while the skater is holding on to the bar with at least one hand.
- Basic Skating Stride at low or medium speed (choose based on player performance) with no hands
- Basic Skating Stride at medium speed to high speed and no hands
- Basic Skating Stride at high speed and no hands
- Skating Stride technique corrections with no hands (We should get through all of the above as quickly as possible so we can get to this stage which is where most skaters who come to us will spend most sessions. Once players are really proficient, they progress where most of their time is spent in the following two modes, but even then some maintenance work will be spent in this “stride corrections” mode.)
- Corrected Skating Stride at high exertion levels (high speed and reasonably high angle)
- Advanced skating and or multitasking techniques
After this final stage above we must both maintain great technique and find ways to continue to advance the challenge level via bursts, speed and angle, and multitasking.
Video Guides – Click this link for 3 videos that offer critical guidance for the process of training skaters using the Bullet Treadmill with Competitive Edge.